Viewing and filtering
Palomino gives you several ways to inspect your photos, and a filter controls what the arrow keys move through, in every view.
Preview and zoom
The main view shows one photo at a time. Move through photos with the left and right arrow keys, or press Space to advance. When the filmstrip is on the left, the up and down arrow keys also move between photos, matching the strip's top-to-bottom order. Opening or collapsing a burst, moving between grid rows, and promoting in the compare view all take priority over this, so the photo navigation applies when none of those do. With the filmstrip on the bottom, only left and right move between photos.
| Key | Action |
|---|---|
| Z | Toggle between fit-to-window and 3x zoom (300%) |
| V | Zoom to the largest face, press again to zoom back out |
| = | Zoom in |
| - | Zoom out |
When zoomed in, drag to pan. Pinch to zoom on a trackpad anchors to the pinch point. Double-click the photo to zoom to the point you clicked, and double-click again to return to fit. Click the fit-to-window button in the toolbar to reset to fit view.
Z centers on the eyes when Palomino has found them. With several faces in the frame it picks the pair that measures sharpest. With a face but no eye points it centers on the face, and otherwise it centers on the middle of the photo. While zoomed with Z, moving to another photo re-centers on that photo's eyes when it has them, so stepping through a burst keeps the eyes in view.
Press V to jump to 300% on the largest face Palomino detects, the same zoom level as Z. This is a fast way to check eyes and sharpness on a portrait. Press V again to zoom back out to fit. When no face is detected, V does nothing.
HDR photos
Some cameras and phones save HDR photos with a gain map, extra data that records how much brighter the highlights should appear than a standard image allows. When a photo carries one, Palomino combines it with the image and shows the result at full brightness in the main view, so a properly exposed sky reads with its detail instead of looking blown out. The extra brightness appears on displays that can show a range beyond standard, which macOS decides per display; on other displays the photo shows in the standard range. Photos without a gain map, and all filmstrip and grid thumbnails, display exactly as before.
Focus mask
Press ⌘F (or choose Focus Mask from the View menu) to paint a translucent colored overlay (green by default) over the areas of the photo that are in focus. The mask answers the question you would otherwise zoom in for: is the focus on the eye or on the branch behind it?
The mask stays on while you move between photos, so you can arrow through a sequence and watch the overlay land on or off your subject. Each photo's mask is computed when the photo appears and fades in a moment later; photos you skip past quickly are not analyzed. The mask follows the image when you zoom and pan.
While the mask is on, a row of color swatches sits at the top-right corner of the photo; it goes away when you turn the mask off. Click one to change the overlay color. Green vanishes on foliage and grass; magenta or cyan stands out against them, and red or yellow works on sky and water. The choice is remembered, applies in the compare view too, and the swatches never take over the keyboard: arrows, ratings, and flags keep working while they are showing. Under the swatches, a Sensitivity slider labeled Less and More adjusts how much of the frame counts as in focus. The overlay updates as you drag, so you can judge the setting by eye without leaving the photo. The same Overlay color choice is in Settings (⌘,) under General, in the Focus mask section.
Settings (⌘,), under General, has a Focus mask section with the same Sensitivity slider. Raising sensitivity shows more of the frame as in focus; lowering it shows less. The mask updates live if it is already on when you move either slider.
A photo with no overlay at all has nothing sharp in it, even at the highest sensitivity setting. That absence is the answer: the frame missed focus everywhere.
The analysis runs on the embedded JPEG preview, the same image Palomino displays. Press ⌘F again to turn the mask off. The mask is a viewing aid only; it is never written to your files or your copies.
Filmstrip
The filmstrip shows every photo in the current folder as a thumbnail. Press Tab to show or hide it. While the compare view is open, Tab switches the active pane instead; use the filmstrip button in the title bar to show or hide the strip. By default, photos that don't match the active filter are dropped from the strip, so a filtered strip shows only the photos you are working through. To keep non-matching photos visible instead, turn off Hide filtered-out photos in Settings (⌘,); they then stay in the strip dimmed to 20% opacity, so you keep your place in the full set while you work a filter.
Filmstrip placement (left side or bottom edge) is also set in Settings. Drag the divider to resize the strip. The main photo shrinks to fit the space that is left rather than being covered, so the whole image stays visible.
A bar across the head of the strip names the open folder and holds the rank order button. The folder name shows the last part of the path. Hold the pointer over it to see the full path, and click it for Reveal in Finder and Copy Path. The rank order button, or R, lays out each burst with its best frame first. See Bursts and stacks for how rank order works.
Grid view
Press G to switch to the thumbnail grid. Click any thumbnail to jump to that photo. Press G or Esc to return to the single-photo view. A slider in the grid's toolbar adjusts thumbnail size.
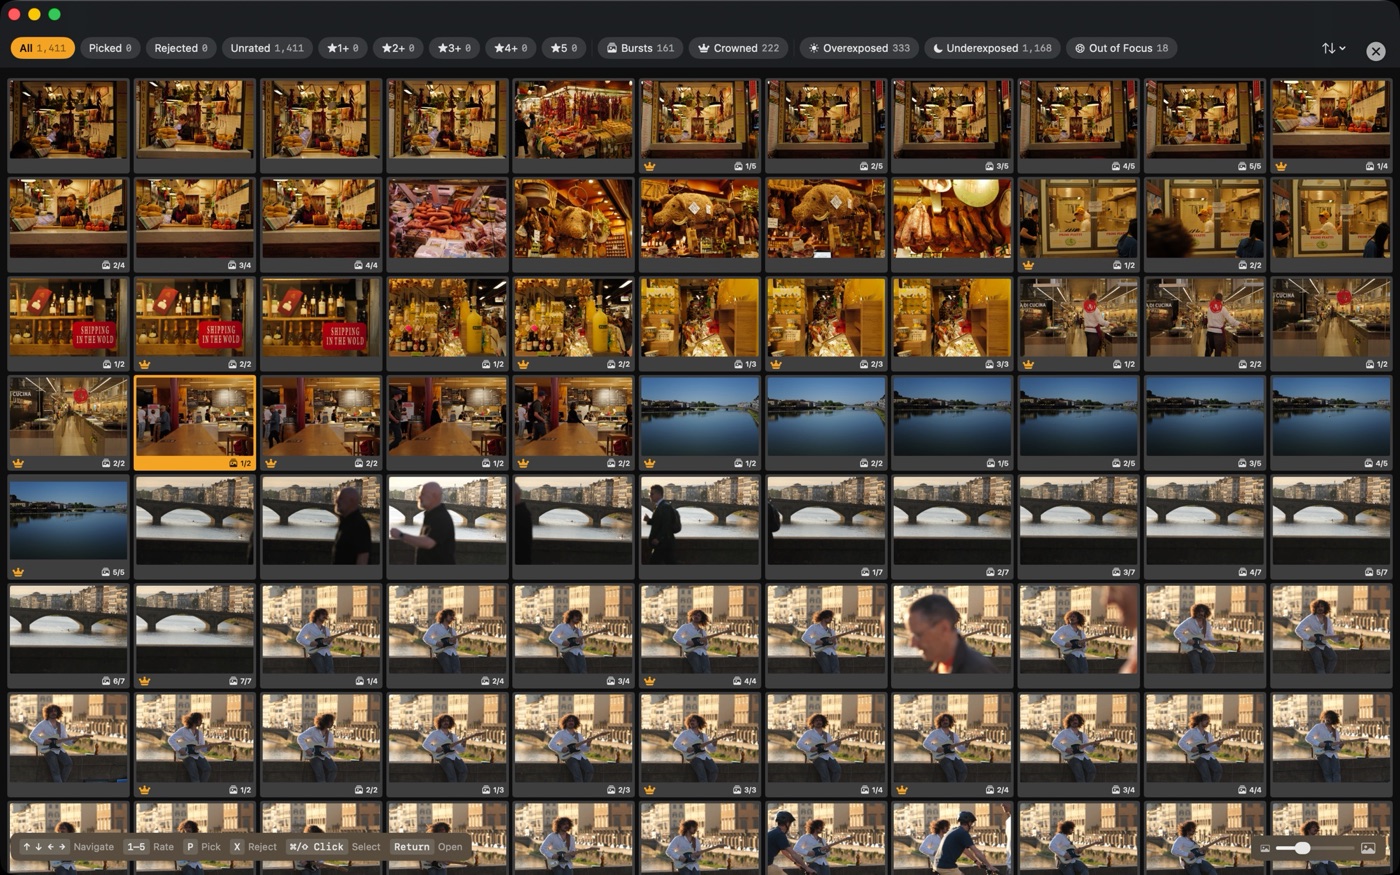
In the grid you can apply ratings and flags with the same keys as in the preview: P, X, 1–5 all work without leaving the grid.
Selecting several photos
Hold ⌘ and click thumbnails to add them to a selection or remove them from it, or hold ⇧ and click to select the range from the current photo. Press ⌘A to select every photo the current filter shows. A bar above the grid counts the selection, and while it is visible the culling keys act on every selected photo: ratings 1–5 and 0, flags P, X, and U, and the color labels 6–9 all apply in one step. One press of ⌘Z undoes the whole batch.
Batch changes assign the value directly. Rating five selected photos with 3 gives all five three stars, including any that already had a rating. A change that pushes photos out of the current filter also drops them from the selection, so a later batch action only ever touches photos you can see. Press Esc to clear the selection, or click a thumbnail without a modifier key. Leaving the grid clears the selection too.
A selection of exactly two photos can also go straight to a side-by-side comparison: press C and the two photos open in the compare view. See Bursts and Stacks.
When you turn on Collapse Bursts from the View menu, the grid shows one thumbnail per burst, the same as the filmstrip. See Bursts and Stacks for how to expand and collapse a burst.
Info panel
Press I to toggle the info panel on the right side. The panel shows:
- Camera body and lens
- Shutter speed, aperture, ISO, focal length, and exposure compensation
- Capture date and time
- Pixel dimensions
- Companion file indicator (for RAW+JPEG pairs)
- A filter list with a live count for each filter
- A Score section once Palomino has measured the photo: the frame's rank among the others in its burst, an aesthetics bar, and a sentence explaining the measurement. On a Mac that can run Apple's on-device model, that sentence is written by the model rather than assembled from fixed phrases. See Bursts and Stacks for what the rank and reason mean.
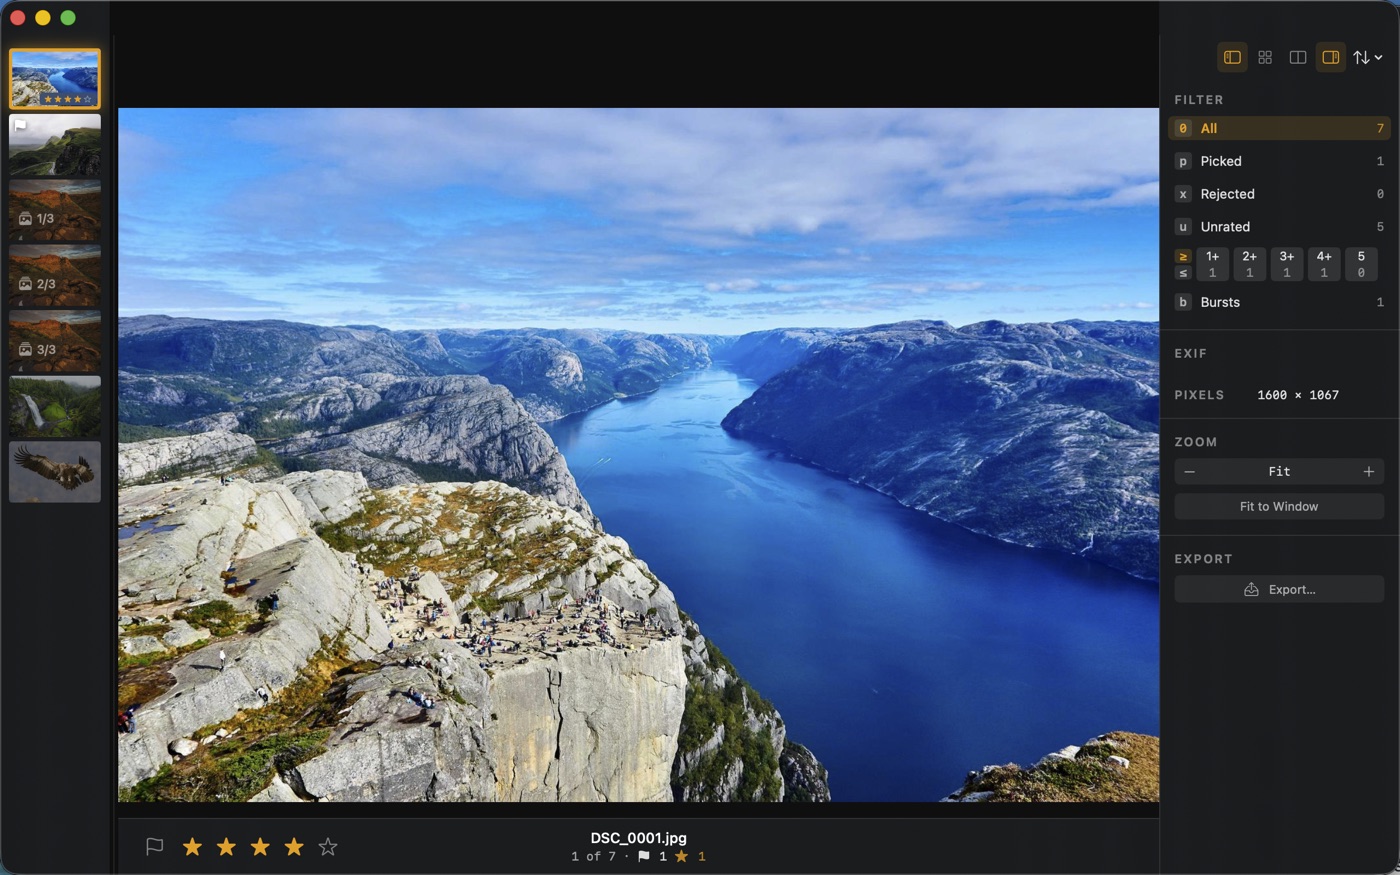
The filter list lets you filter without leaving the single-photo view, and you can do the same from the keyboard by pressing F. See below for the full set of filters and the star direction toggle.
The genre chip stays at the top of the panel while the sections below it scroll. Click the FILTER, EXIF, SCORE, or ZOOM header to collapse that section, and click it again to expand it. Palomino remembers which sections are collapsed between launches. The Copy to Folder section stays open and has no collapse control.
Reading the status bar
The status bar at the bottom of the preview window always shows:
- Filename of the current photo
- Position counter: for example, "37 of 412" (reflecting the current filter)
- Pick count for the open folder
- Star rating controls
- Crown and eyes-closed badges, when they apply to the current photo
- Exposure summary: shutter, aperture, ISO
When a filter is active, a label appears in the status bar showing which filter is applied.
Session stats
Press ⌘⇧I, or choose Session Stats from the View menu, to see how the session is going. The window shows the session time and your culling pace in photos per minute, a bar chart of how the star ratings are distributed, and the picked, rejected, and unrated counts. When the shoot contains bursts, a Burst Savings section adds how many groups you have resolved, how many duplicate frames you skipped, and, if the shoot has focus stacks, how many stack layers you skipped. The completion card that appears after a copy links here too, so you can read the session's numbers right after the handoff.
Sort order
By default, photos are sorted by capture date and time from EXIF data. You can switch to filename, file size, or modification date from the sort menu, marked with up and down arrows. In the preview the menu sits at the right end of the toolbar, and in grid view it sits at the right end of the filter bar. The same choices live under View > Sort Order in the menu bar. Capture date is the right choice for most shoots; filename order may disagree with capture order on multi-camera or multi-card jobs.
Shoot genre
Palomino reads the open folder and works out what kind of shoot it is, such as a wedding, a wildlife outing, a sports fixture, a landscape trip, a macro sitting, a portrait sitting, or an event. The genre appears as a chip at the top of the info panel in preview mode, and beside the sort menu in the grid filter bar.
Click the chip to see what Palomino read and to change it. The popover names the genre in plain language, for example “Looks like a wedding.” Below that, Auto leaves the reading to Palomino and the genre list sets the folder yourself. Your choice is saved with the folder and comes back the next time you open it.
The genre is read on your own Mac, from a sample of the photographs and from what Palomino has already measured about them. Your photographs are never uploaded. It needs macOS 27 and a Mac that can run Apple’s on-device model. On earlier versions of macOS the reading was wrong often enough to be misleading, so the chip stays hidden there rather than showing a guess.
The genre is a label on the folder. It does not change ratings, flags, or which frame gets the crown.
The popover also names what the score leads with for that kind of shoot. A wedding, an event, or a portrait sitting leads with whether the eyes are open. A wildlife or sports shoot leads with sharpness and how much of the frame the subject fills. A macro shoot leads with sharpness and whether the frame is part of a stack. A landscape shoot leads with light and exposure. This changes what the reason sentence in the Score section talks about first. See Bursts and Stacks for the reason sentence itself.
Filter by flag, rating, or label
Filters restrict what you see and move through. When a filter is active, the arrow keys skip non-matching photos, the position counter reflects only the filtered set, and the grid shows only matching thumbnails.
The filter bar at the top of the window shows chips for every available filter. Click a chip to activate it. Click an active chip to clear it and return to all photos.
Available filters:
- Picked: photos you flagged with P
- Rejected: photos you flagged with X
- Unrated: photos with no stars and no flag
- ★1+ through ★5: photos at or above a minimum star rating. You can also flip the direction to show photos at or below a rating, for example everything rated 2 stars and fewer. The direction control lives in the single-photo view and the info panel.
- Color labels: Red, Yellow, Green, Blue (only labels that appear in the folder are shown)
- Bursts: photos that belong to a burst group
- Stacks: photos that belong to a focus stack, detected or marked by hand
- Crowned: Palomino crowned these frames as the best of each burst or stack. The chip appears once the folder has crowned frames.
Filtering from the single-photo view
You can filter straight from the single-photo view, without switching to the grid. Press F to open the filter prompt, then press one key to apply a filter:
| Key | Filter |
|---|---|
| 0 | All photos, which clears the filter |
| 1–5 | Star rating |
| , / . | Star direction: , shows that rating and fewer, . shows that rating and more |
| 6–9 | Color label: Red, Yellow, Green, Blue (or the Phocus mapping when that convention is selected in Settings) |
| P | Picked |
| X | Rejected |
| U | Unrated |
| B | Bursts |
| S | Stacks |
| C | Crowned |
| D | Capture day, which opens the day picker |
Press Esc, or click outside the prompt, to close it without choosing.
For star ratings the prompt shows two direction chips. . keeps the "and more" direction, so ★2+ means two stars and above. , flips to "and fewer," so ★2− means two stars and below. The direction resets to "and more" each time you open the prompt.
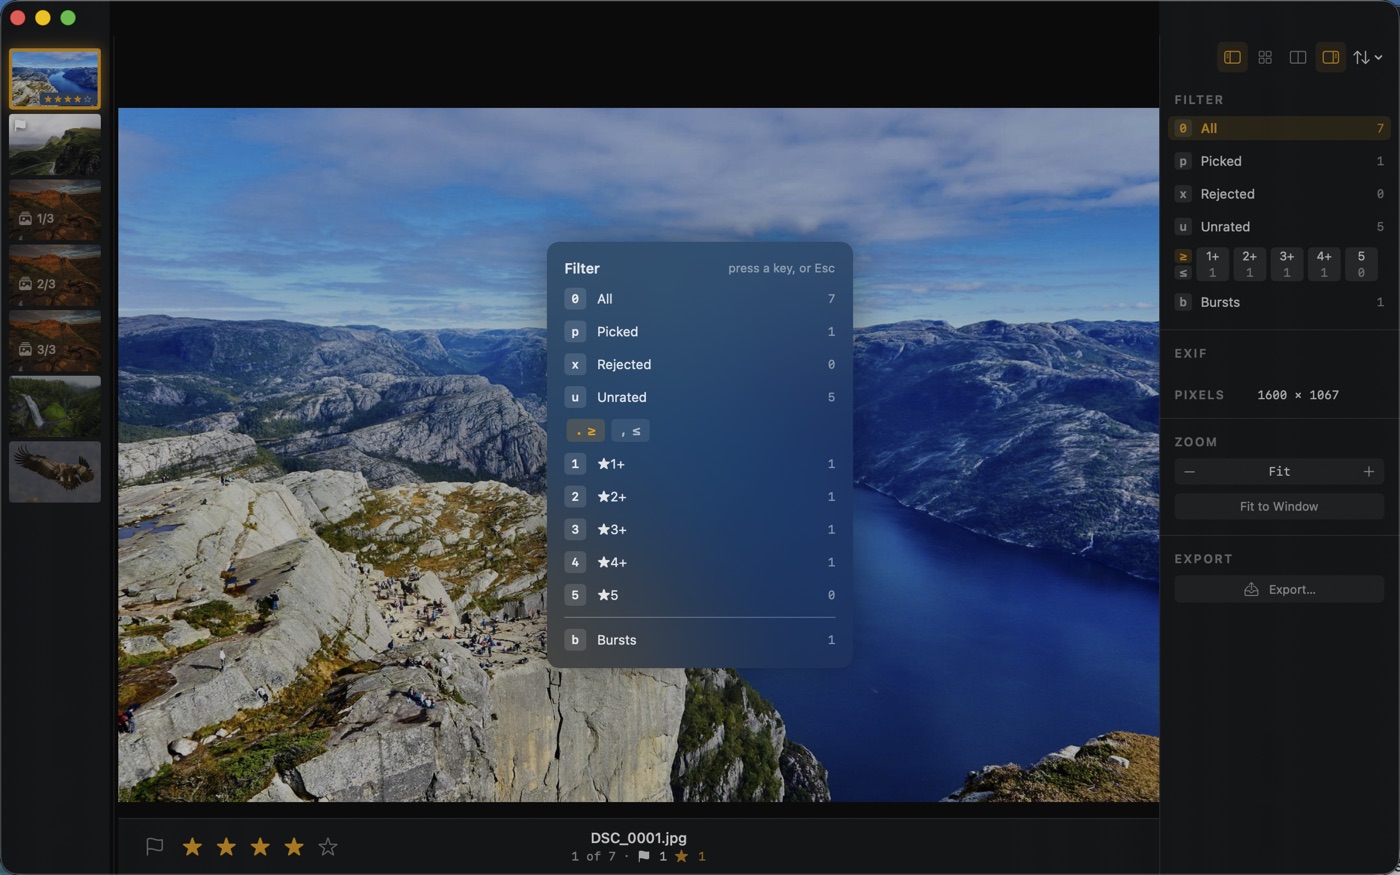
The info panel (I) carries the same filters as a list you can click, each with a live count of how many photos match, plus the same star direction toggle. The single-photo view and the info panel act on the same filtered set, so use whichever is faster for you.
Quality hint filters
After Palomino analyzes the folder in the background, three additional filter chips may appear:
- Overexposed: more than about 2.5% of pixels are blown to white
- Underexposed: more than about 15% of pixels are crushed in the shadows
- Out of Focus: the image looks soft or motion-blurred based on an automatic sharpness check. This is a hint, not a verdict.
These are hints, not verdicts. A black-background portrait, a star-trail shot, or a photo with strong bokeh may trigger them incorrectly. Filter chips for quality hints appear only after background analysis finishes for the first time.
Marking a photo as intentionally soft
If the out-of-focus badge is wrong for a particular photo, for example intentional motion blur, strong bokeh, or a macro shot, press B to mark it as intentionally soft. The badge is suppressed and the override is saved with the session. Pressing B again clears the override.
Filter by capture day
On multi-day shoots, a set of day chips appears in the filter bar showing each date found in the EXIF data. Click a day chip to restrict the view to photos from that day only. Click it again to clear.
The capture-day filter also narrows what you copy. With a day filter active, the Copy to Folder sheet offers only that day's photos that also match your rating or flag selection. To copy a full multi-day shoot, clear the day filter first. See Copying Your Selects.
Quality hint chips haven't appeared yet. Background analysis runs after the folder loads and can take a few minutes for large folders. The chips appear as soon as any photos in the folder are flagged with a hint. If the folder was opened before and analysis already ran, results are restored from the session file instantly.